
Quotations
Quotations are requests for vendors to provide us information about their best prices, terms and conditions, schedule of deliveries and other information in order to select the best source for our procurement needs.
Below you can see the process flow for quotations in purchasing in SAP MM module.

Quotation process is started with creation of a request for quotation, and afterwards maintenance of the quotations to input all the information received from possible vendors. Then we want to compare the offers and select the best suitable one(s) rejecting the others. In SAP, there are several transaction used in the process.
How to create Request for quotation
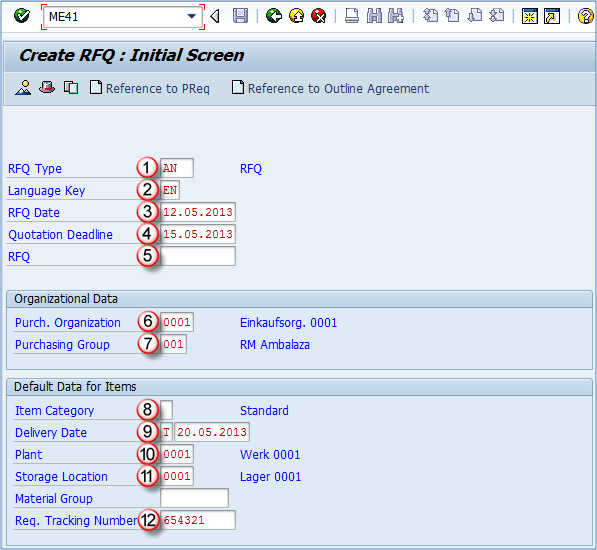
First we need to create a request for quotation. RFQs can be created by transaction ME41. We can create a new RFQ from scratch, or create one referencing to an existing purchase requisition or outline agreement. If you want to create the RFQ using a reference document, you will just need to click the appropriate button and enter the referencing document number. In this case, we are creating a new RFQ with no reference document. Step 1) In transaction ME41 , enter:
- RFQ type: quotation type (A – standard RFQ).
- Language key: language to be used in a quotation (EN – English).
- RFQ data: Todays date.
- Quotation deadline: this date has to be before delivery date.
- RFQ number: enter a number you want to assign to quotation (if you want it to be assigned internally leave this field blank).
- Porch organization: purchase organization (e.g. 0001).
- Purchasing group: purchasing group (e.g. 001).
- Item category: default is blank – standard item.
- Delivery date: requested delivery date.
- Plant.
- Storage location: SLoc for goods receipt.
- Requirement tracking number.
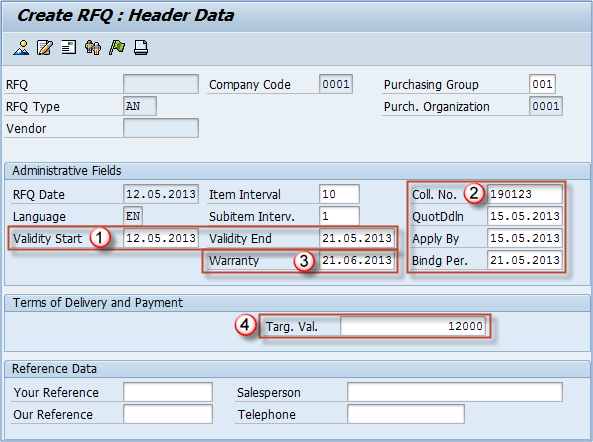
Press ENTER, and you will be located on header data screen.
Step 2)
- Validity range: enter the range for the validity period.Other information such as collective number (collective management of multiple documents), deadline for bid submission, closing a date for applications and binding period for quotation.
- Collective number – Coll.no is a very important field as you can later compare quotations based on this information, or find RFQs using this number.
- You can enter the warranty date if applicable.
- Target value: threshold value for warning a message during the creation of the contract release order.
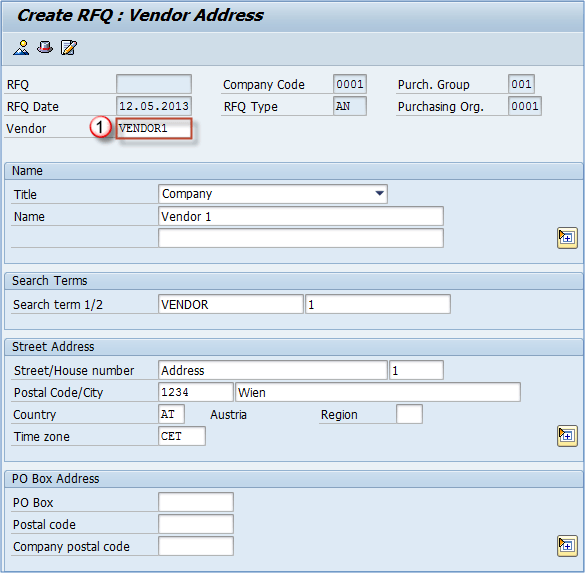
You should inspect the toolbar to see which screens can be called by using the icons.
Step 3) Among the icons in the toolbar you will find “Vendor Address” button, where you can:
- Choose the appropriate vendor. If it’s one time vendor, after entering vendor number you need to specify vendor address.
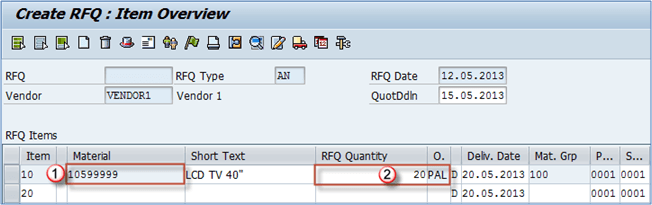
Step 4) In the toolbar, you will also find the overview button which calls the item overview screen.
![]()
Item overview screen is the place where you can enter item information, materials, quantities…
- Material number: insert materials to be procured.
- RFQ quantity: enter needed quantity and unit of measure.You can inspect more screens from toolbar and save the document.
![]()
You can always go back to edit the request for quotation using the t-code ME42 or display it’s information using ME43. Repeat the above process to send the RFQ to all of the vendors from which you are requesting a quotation.
If you have maintained a collective number in your quotations (we have used 190123), you can review all of the quotations for the collective number by using transaction code ME4N.
How to Create Quotation in SAP MM
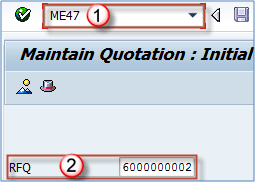
Using transaction code ME47, we can create a quotation based on a request for quotation.
Step 1)
- Transaction code for quotation maintenance – ME47.
- RFQ: request for quotation that we are using as a reference document.
- Press ENTER.
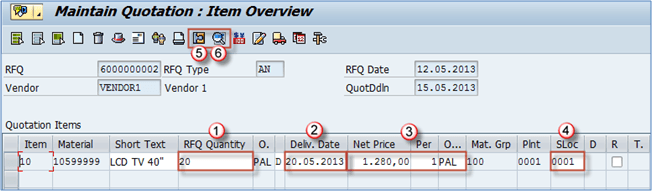
Step 2)
- RFQ quantity
- Delivery date
- Net price per unit of measure
- Storage Location
- Item details you will be presented the following screen.You may change details as per your requirements
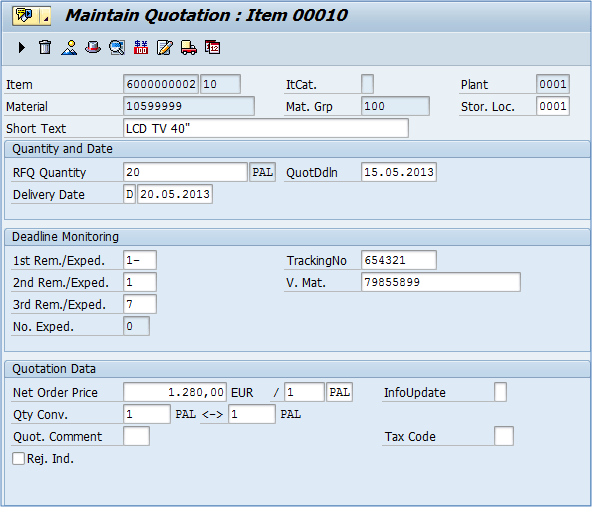
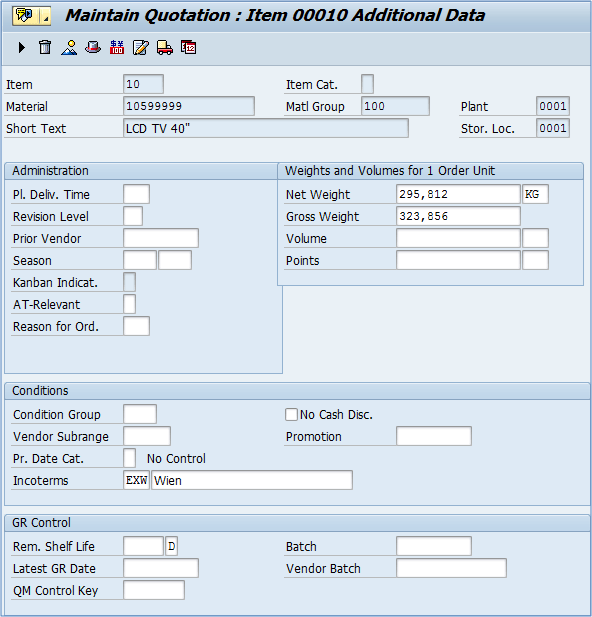
- Additional data you can access some additional information on item level.
- If you want to change general header data click on the “Hat” icon.


- If you choose Item Conditions icon/button you can maintain pricing conditions for the currently selected item. Here, you can enter conditions like surcharge, freight cost, discount etc.
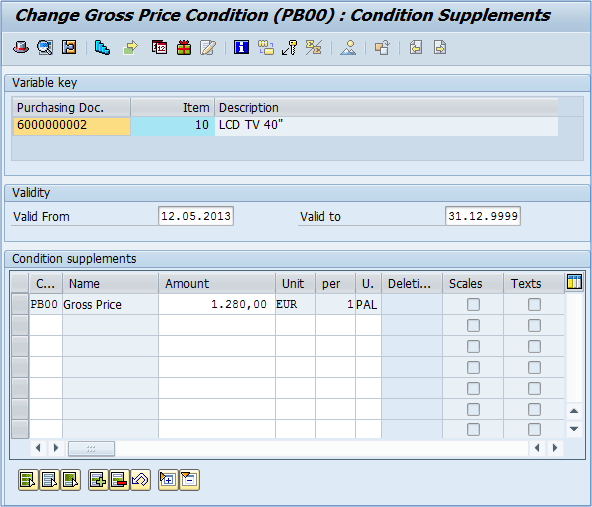
If you are done, you can save the data. If you need to change the quotation, you can do it by using the same t-code (ME47), or you can display it’s data by using ME48.
![]()
You can repeat the process to create quotations for all of the RFQs. If certain vendor didn’t answer your request for quotation, then you will not create a quotation for the vendor.